When you’re working on a DIY project, it can be really handy to have a few tools in your toolbox that you can use easily and quickly. Swivel-type chain stoppers are one of those tools. In this tutorial, we will show you how to make a swivel-type chain stopper using just a few basic materials. This tool is great for preventing chains from getting tangled up while you work, and it’s also perfect for use on projects like swings and climbing frames. So let’s get started!
What is a Swivel Type Chain Stopper?
A swivel-type chain stopper is a great way to keep your bike from being stolen. By using a swivel-type chain stopper, you can attach the bike to an object so that it cannot be easily moved. This type of chain stopper is also great for keeping your bike secure when you are not using it.
How to Make a Swivel Type Chain Stopper
Chain stoppers are often used to secure a bicycle wheel in place. They’re also popular for use with tools and other objects that need to be held in one place. There are a few different types of chain stoppers, but the most common is the swivel type.
To make a swivel-type chain stopper, you’ll need some supplies: a length of chain, a bolt, a washer, and a nut. The first step is to measure the circumference of your wheel. This will help you determine how long the bolt needs to be.
Next, take the bolt and washer and fit them together so that the edges line up perfectly. Make sure that the nut is tightened down so that it’s snug against the wheel hub. You now have your swivel-type chain stopper!
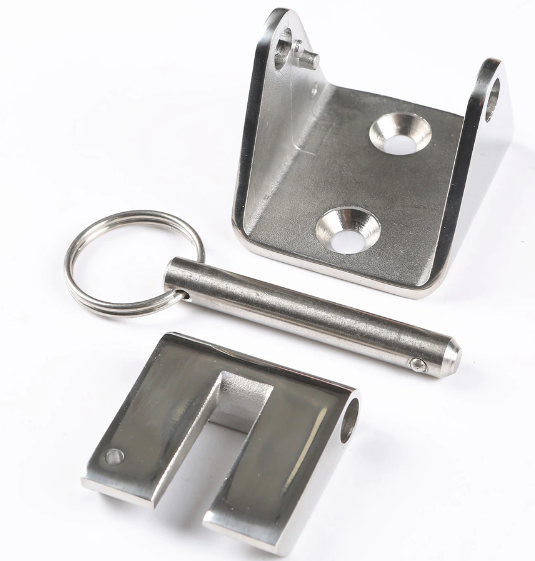
The Parts of a Swivel-Type Chain Stopper
A swivel-type chain stopper is a great addition to any toolbox. This simple project can be made in just a few minutes using a few common materials and tools.
The parts of a swivel-type chain stopper are:
– A metal bar with a hole drilled through it at one end
– A bolt with a head that fits the hole in the metal bar
– A washer or nut (depending on the application)
– Achain (optional)
To make the swivel-type chain stopper, start by cutting the metal bar to the desired length. The hole, in the end, should be large enough to fit the bolt and washer/nut, but not so big that it becomes difficult to turn. If you’re planning on using a chain, make sure to cut the bar slightly shorter than required so that it will easily turn with the chain attached.
An alternative method of making this project is to use an existing item as the metal bar. For example, with Float rope you could take an old door knob and drill a hole through it at one end. You may also want to consider using a forging process to create a more solid piece of metal for use as your metal bar.
How to Use a Swivel Type Chain Stopper
If you’re looking for a quick and easy way to keep your chain from coming off your bike, look no further than a swivel-type chain stopper. This simple device attaches to the rear derailleur and prevents the chain from rotating freely.
To make one, you will need:
-A small piece of metal (a bolt or a washer)
-A chain stopper (available at most bike shops)
-A bicycle lock
-A hole in your frame
Step 1:attach the metal piece to the chain stopper. Make sure it is large enough so that the end of the chain can fit through, but not too large that it will snag on anything. If you are using a bolt, be sure to thread it all the way through so that it forms a tight seal. If you are using a washer, simply place it over the bolt and press down until it fits snugly.
Step 2:attach the bicycle lock to your frame near where you plan to install the chain stopper. Make sure that the shackle extends well beyond the metal piece so that it cannot be easily removed without tools. You also want to make sure that there is enough slack in your chain so that it will still move freely when installed.
Tips for Making a Swivel Type Chain Stopper
There are a few different ways you can make a swivel-type chain stopper. The easiest way is to use a clothespin. You’ll need two clothespins: one for the top loop and one for the bottom loop. Make sure the top and bottom loops are the same size.
Thread one of the clothespins through both of the loops, making sure that it’s secure. Then, use your other hand to hold onto the ends of the loops so they stay in place.
Materials
If you’ve ever been annoyed by how many times you have to stop your bike to put on a chain, then this tutorial is for you. This simple project uses just a few materials and can be done in minutes.
What You’ll Need:
-A length of chainlink or heavy-duty wire
-An old bicycle pump or air compressor
-A drill with a 1/4-inch bit
-A Phillips head screwdriver
-Saw
-Steel wool or a metal file
Step One: Cut the chain-link into four even lengths. This will be the width of the swivel-type stopper.
Step Two: Make a hole in one end of each chainlink piece so that the screwdriver can fit through. The hole should be big enough for the drill bit to go through easily but small enough so that the screwdriver can’t fall out (you don’t want it falling onto your bike while you’re trying to work!).
Step Three: Thread each screwdriver end through one end of the chainlink and tighten them gently using the Phillips head screwdriver. Be sure not to overtighten as this could damage your bike’s frame!
Step Four: Saw off one end of each piece of chainlink so that they are now square. You will now need these squares to create your swivel-type stopper.
Step Five: File down any sharp edges on each square until they are smooth.
Step Six: Store your swivel type
Tools
There are a few different ways to make a swivel type chain stopper. The easiest way is to use a bolt and washer. You will need a bolt that is at least 2 inches long, a washer that is the same size as the bolt, and a nut.
Step one: Drive the bolt into the post so that it is flush with the top of the hole. Apply pressure on the washer so that it seats against the bolt. Tighten the nut until it is snug. Step two: Use your chain saw or handsaw to cut off excess chain so that it doesn’t hang down below the stopper.
Instructions
To make a swivel type chain stopper, you will need:
-A circular saw
-A jigsaw
-A drill bit that is the same diameter as the chain link
-A screwdriver
-Chainmaille wire (or heavy duty string)
-An awl or needle
1. Start by cutting a piece of chainmaille wire about 2 inches wide and long enough to wrap around the circumference of your drill bit. You’ll also need to cut a small hole in one end of the wire so that you can thread it through the hole on your saw blade. Make sure that both ends of your wire are securely fastened together with a screw.
2. Cut three pieces of chainlink approximately 1-inch square from your sheet metal. The easiest way to do this is to use a jigsaw with a metal cutting blade – make sure to wear safety goggles and keep your hands well away from the blade! Assemble the three pieces of chainlink so that they form a triangle, then fasten them together with screws at each corner.
3. Thread one end of your wire through one of the corners of the triangle formed by the chainlink, then tie it off securely with a knot. (You can also use an awl or needle to make this connection.)
4. Repeat these steps for each corner of your triangle – making sure that each knot is oriented so that it forms an “X” across the
Conclusion
If you’re looking to add a bit of extra security to your jewelry, a swivel type chain stopper is a great option. Not only will it keep your necklaces and bracelets from becoming tangled up, but it also looks sleek and stylish. In this article, we’ll show you how easy it is to make one yourself using just some supplies from your local craft store. So be sure to give it a try the next time you need to keep your jewelry tidy and safe!